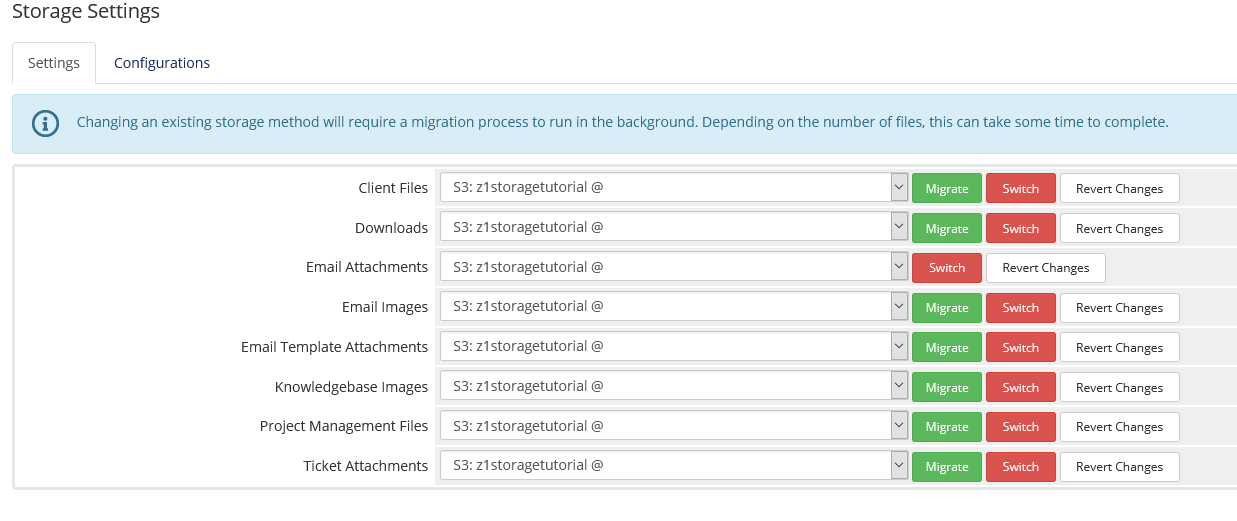
Configuring Z1 Storage to be WHMCS's primary storage for:
- Client Files
- Downloads
- Email Attachments
- Email Images
- Email Template Attachments
- Knowledgebase Images
- Project Management Files
- Ticket Attachments
**Important - always have a backup of your files before adjusting storage points.
**
Step1 - SetZ1 Storage as a storage option within WHMCS.
- To do this, you will need to navigate to Configuration > System Settings > Storage Settings

(for version before WHMCS 8.0 you will need to go to Setup > Storage Settings).
- Select the Configurations tab.

- In Add New Configuration panel, select S3 from the dropdown menu of options and click the button labelled with a +.

- A new settings block will appear. Here you will configure your Z1 Storage backup for WHMCS.
Enter the Access Key, Access Secret (Secret Key) and Bucket Name.
You can leave the Region option empty as Z1 Storage will automatically allocate your accounts data center for backups.

Click Save Changes. This will validate your entries and complete the process.

- Once successful, you will see your Z1 Storage bucket setup as a backup option.

Note: If WHMCS is unable to connect for any reason, an error message will be displayed. Check your entries and/or the permissions of your configured API user and try again.
Step 2 - Configure what you would like to store in the cloud with Z1 Storage.
- Begin by navigating to Storage Settings > Settings

- Then adjust the storage location of the various file types, to your newly setup Z1 Storage, storage point:

When done setting all storage points to your new Z1 Storage S3 API storage; it will look like this.

- Here you will choose to either
Migrate ( move all locally stored file to your new Z1 Storage service )
or you will select
Switch ( this will place all new files into the Z1 Storage cloud).